
Well today we finally made it into the lacquer spray booth to apply the finish to our electric guitars. After a week of finish sanding, fret work and a host of other last minute, detail oriented things, I taped off the fingerboard and started to shoot the guitar with the first of many coats of lacquer. I'm guessing that I'll be finished with the first stage of this process this coming Monday, at which point the instrument will hang in a humidity controlled room allowing the lacquer to fully cure. So there's a chance I will have this thing buffed, wired and set up by the end of the month.
Joe Parker standing over his ready-to-be sprayed guitar, a design he based on one of his Teisco's:
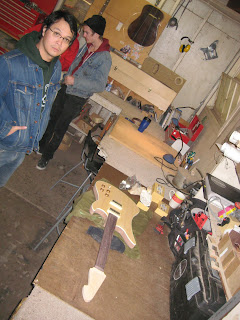
Closer up:

Clamping and gluing in the frets on my guitar (I fit a piece of cardboard around the end of the neck to protect the face of the guitar during this process):

The fingerboard is then covered in low-tack tape prior to spraying the lacquer finish:

In the spray booth, note the spray gun to the right. Behind the guitar is a powerful fan which sucks the airborne lacquer out of the booth. You can't tell by this photo but the sky lights in the spray booth proved excellent natural light to scrutinize your work. When that first coat of lacquer goes on... wowee!!! Now we're cookin'! The figure in the wood grain starts to develop an amazing 3-D look:


After a coat, the guitar hangs to dry:

There are some great looking guitars being built by the students here at R-V. Here are a few of them hanging in the humidity room after the first day of spraying:


This photo really doesn't do the figure of the maple top justice:

And another amazing Arizona sunset over the grounds of R-V:


No comments:
Post a Comment